Part 1: Enable Open Position Mode
Edit Current Campaign:
-
If your campaign is currently set to Auto Entry mode, click Edit to modify the campaign.
Switch to Auto & Open Entry Mode:
-
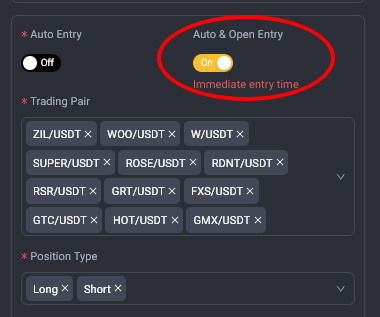
In the editing menu, select Auto & Open Entry mode.
Save and Restart the Campaign:
-
After editing, click Save to apply the changes and Start to restart the edited campaign.
Part 2: Execute Open Position
Access the Edited Campaign:
-
Click on the campaign you just edited.
Display Open Position Option:
-
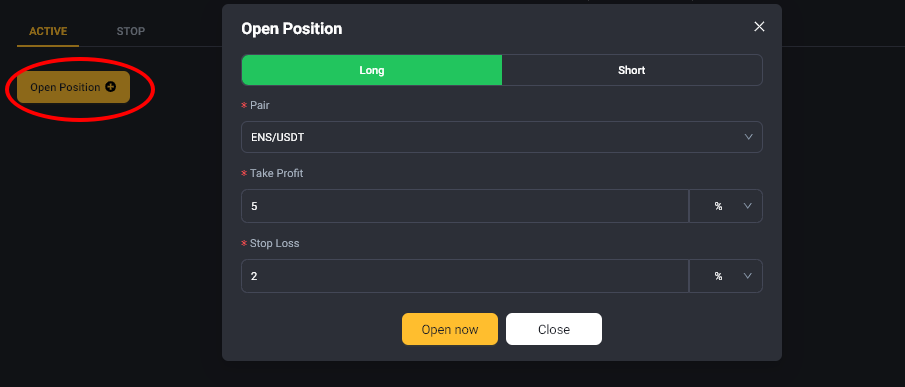
The screen will show the Open Position option. Click on this to begin configuring the trade.
Select Trading Direction:
-
Choose Long/Short: Select your desired trading direction by clicking Long (buy) or Short (sell).
Select Currency Pair:
-
Choose Currency Pair: Click on the currency pair you want to trade. Note: Only the currency pairs you selected previously will be displayed.
Set Profit %:
-
Configure Profit Percentage: Enter the % profit you want the BOT to take for each trade.
Set Stop Loss %:
-
Configure Stop Loss Percentage: Enter the % stop loss you want the BOT to activate to manage risk for each trade.
Part 3: Execute Trade
Click Open Now:
-
Click Open Now to execute the order immediately at the market price for the selected currency pair.
The trade will be executed immediately based on the settings you have configured, ensuring that your conditions are met in the fastest and most efficient manner.